Difference between revisions of "MTS2:Creator Guidelines/Sims 3 Poses and Animations/Sandbox"
(→Quality) |
(→Quality) |
||
| Line 15: | Line 15: | ||
! style="text-align:left" | Naturally Posed | ! style="text-align:left" | Naturally Posed | ||
|- | |- | ||
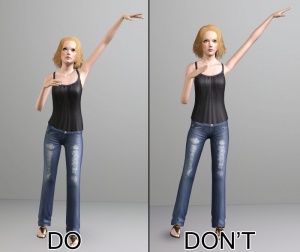
| − | + | '''[[Image:Guidelines_poses_posewholebody.jpg|right|thumbnail|300x300px]]'' | |
Always try to alter every or at least almost every joint a little bit. Altering just a few joints can leave your pose looking quite stiff and unnatural. Begin with the big changes and work your way down to the details. Don't forget to pose the face, hands and fingers as they count a great deal to the final quality of your pose. | Always try to alter every or at least almost every joint a little bit. Altering just a few joints can leave your pose looking quite stiff and unnatural. Begin with the big changes and work your way down to the details. Don't forget to pose the face, hands and fingers as they count a great deal to the final quality of your pose. | ||
|- | |- | ||
Revision as of 09:58, 7 November 2013
Contents |
Sims 2&3 Poses and Animations Upload Guidelines
When uploading a pose pack or animation for The Sims 2 or 3 to Mod The Sims, we have some basic requirements to ensure that your upload is good, shown well, and has the correct info and files needed for people to use it in their games. This allows both moderators to check your uploads for quality, and for downloaders to see if your item is something they want to add to their games.
Below is a WIP that still needs to be edited to incorporate poses and animations.
Quality
| Naturally Posed |
|---|
Screenshots
|
Information
| Title & Description |
|---|
| Give your upload a descriptive title and write a text description for your upload, describing what you're uploading. Your title and description must be in English or provide an English translation. If you are not a native English speaker, using Google Translate is okay. You can also ask for help writing your description in the Creator Feedback Forum. |
| Expansions Required |
|---|
| When uploading your sim, you'll be asked to tick which expansion packs (EPs) and stuff packs (SPs) are required for your sim. Unless the content used on your sim from an EP/SP is absolutely essential to the overall look of the sim and they would look totally wrong without it, do not tick any EPs/SPs. This is because all sims can be used in the base game if installed with Clean Installer, and if someone is browsing MTS to show only uploads that use the EPs/SPs they have ("compatible" uploads) then they will not see your sim, even though they could still use it with just a change of hair or clothes. You can still mention "Hair is from Open for Business, clothes are from Apartment Life" etc., so people without those packs aren't surprised when they go to use your sim in-game. |
| Credits and links for custom content |
|---|
| You are responsible for providing accurate descriptions, links, and credits for all pieces of custom content included with or pictured on your sim. This is to give credit to the creators for their hard work, and to make sure downloaders can get anything that isn't included by downloading it separately.
You must look inside the .sims2pack file to see what is included. You will need to remove any content that the creator says you can't share. You will also need to collect credits and links for any content you have included in your screenshots, even if it didn't package with your sim (like default replacement skintones or eyes), as well as any required meshes for hair, clothing, or accessories. This is usually the most labor-intensive part of uploading sims, so it may be a good idea to organize your content before making sims to share, so you know all the custom content you might want to use is is shareable and identifiable.
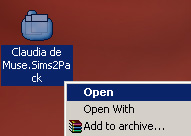
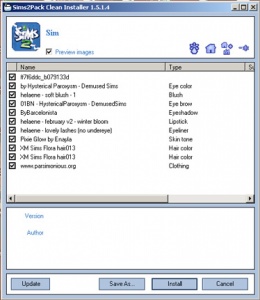
To see what's inside your sims2pack file (look, you'll need to get Clean Installer, a free program which is safe and easy to use. Once you install Clean Installer, it should associate itself with .sims2pack files, so when you double-click on any one of them to open it, Clean Installer will come up and tell you what is inside. To open your sim in Clean Installer, go to your Desktop. You should find a new file there, with the same name that you gave your sim in Body Shop when packaging. It should have an icon like the one shown. Right-click on this file and choose Open.Clean Installer will open and you will see a list of the contents of the sims2pack file, including what description the creator may have entered when they made the file, in the "Name" column. You can check the filename for a particular item by floating your cursor over it.
Now you need to:
Start a text file on your computer where you can type everything out as you locate the parts. This can be the most tedious part, depending on how descriptive the original creators were in their descriptions and filenames. They are generally good clues, though. It's a good idea to start your text file by typing in the custom items you know are on your sim (skin, hair, lipstick, etc.), so you know when you have a credit and link for each item, and then also make a section for any required meshes and the links and credits for those meshes. Then you can begin filling in each item as you find out where it came from.
|
Screenshots
| Screenshots | ||
|---|---|---|
| Take some nice big (600 pixels or more on the smallest side is a good size to aim for), clear pictures of your sim. Your pictures should be in-game (not in Body Shop), and you can either take your pictures in Create-a-Sim or (even better), put your sim on a lot, indoors, and in a well-lit room so they look their best.
You will need to include at least:
Please remember, for your required pictures:
Tip: You may, of course, include other pictures like a full-body picture, posing pictures, whatever, to show off your sim how you like, and if your sim is a toddler, child, or teen, you may want to include a picture of how they'll look when they grow up, just so downloaders aren't surprised when if your cute kid turns into a weird-looking adult.
|
Other
| Uploads not allowed on MTS | ||||
|---|---|---|---|---|
These items are not allowed on MTS in any category.
|


