Tutorials:TS3 Meshing FAQ
| Tutorials by Category | |
|---|---|
|
CAS | Patterns | Objects | Building | Worlds | Modding | Modding Reference |
Contents |
General
Information Overload! Where do I start?
It is always best to start small with a project, just to get an idea of the process of creating. Most tutorials start with a simple table. Why? Because it consists of boxes. Easiest to make and easiest to map. Start with the most comprehensive tutorial, it covers everything from getting your tools setup, to meshing, uvmapping, adding slots, enabling channels, changing default textures, baking a multiplier, and assembling the object package.
Which Tools do I need?
Meshes
Depending on the object you cloned there will be up to four meshes that you have to edit:
- MLOD 00000000 High detail mesh
- MLOD 10000001 High detail sunshadow
- MODL 00000001 Low detail mesh
- MLOD 10000001 Low detail sunshadow
My mesh is invisible
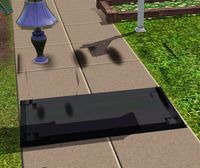
If your mesh appears to have taken odd shadings, or all you can see is the ground shadow, then you have mixed up the group order of your objects in Milkshape. For example: if you have cloned a mesh from the game and it has two groups inside it called: group_0(being the shadow part of the mesh) and group_1 (the actual mesh), then you need to have in your newly made imported mesh two similar groups with the same exact order according to its functionality. In ts3 the order of the groups is very important for the game to know which texture properties to apply to it. You will need to make note of the order of the groups and which mesh is in what group when you first import your mesh.Quick fix: In Milkshape use the Up/Down buttons in the group tab to move the groups to the proper order.
If your groups are in the correct order then check to make sure your Multiplier does not have a black alpha.
My object disappears when a sim used it
Each object in TS3 has at least one joint that it is assigned to, but some have more than one. Objects that animate when a sim interacts with them will have the object disappear if the joint is not assigned or reassigned properly.To fix this you will need to know what joint the original mesh was assigned to. If you did not make note of it then you may need to reimport the original mesh into Milkshape to find it.
Quick fix: Select the mesh part to assign to a joint, Select the joints tab, scroll to find the joint, then click assign.
How do I get my poly count
s3pe
- Open your object in s3pe
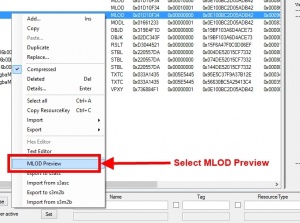
- Right click on the MLOD line
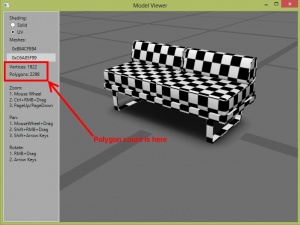
- Select MLOD Preview to open the Model Viewer
- The polygon count will be on the left side
TSRW
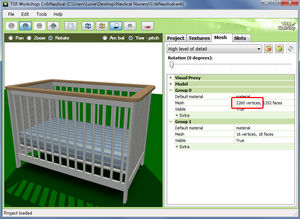
- Click the Mesh tab
- Set drop down box to High level of detail
- This section may vary, but in this case Group 0 is the mesh and Group 1 is the shadow (you only want the total of all mesh groups and not the shadow)
Textures
![]() For more information on the dds files in your package please see the IMG File Type for a more detailed explanation of what job they perform.
For more information on the dds files in your package please see the IMG File Type for a more detailed explanation of what job they perform.
My mesh is shiny
Does your mesh take on a very milky shiny look in game? This is because the alpha layer of your specular is white instead of black. Change it to all black and it will lose the milky shine.- Specular - black alpha
- Multiplier - white alpha
- Mask
One part of the texture fades
Wondering why the image is faded on one part of your mesh and not another when they share the same channel? One channel is faded? Well take a look at your mask, you have RGB values that are not pure. Make sure each one is 255 for each respective color, if they are slightly off or even largely off, your texture will have a faded look to it. R(255,0,0) G(0,255,0) B(0,0,255)This could be useful too! So don't forget it.
My texture is Distorted
The tiling needs to be adjusted. In TS3 you can't simply take your original 256x256 image and change it to 512x512 without adjusting some other values too, otherwise the game will not render the new image properly. If you want to change the image size of your object you will need to also change the tiling. This may be in addition to the Blurry texture issue.Quick fix:
- Open the package in TextureTweaker3.
- Click the CASt presets tab.
- Change Tiling X and Tiling Y on the right hand side of the screen. Make sure to change the tiling for each pattern that is enabled.
- Image Sizes and corresponding tiling: 256 - 1, 512 - 2, 1024 - 4
My texture is Blurry
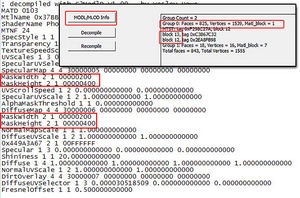
You have created a larger image than the original clone had so you need to edit some values in your mesh before recompiling. You will need to edit the .mtlsrc of the blocks that are responsible for your texture (block 13 and 14 as shown in the example). To find them use ObjTool and select Model Info. The blocks for your material will be the group with the most vertices, (MLOD-00000), and underneath it will show you which blocks. Edit those blocks in a text editor, finding the two lines that list MaskWidth and MaskHeight. Change these to whatever your new image size is.
Mask Width/Height Values:
- 00000080 is 128
- 00000100 is 256
- 00000200 is 512
- 00000400 is 1024
Shadows
My shadow doesn't match my object
- Sunshadows are generated using the shadow LODs, or you can use TSR Workshop to generate sun shadows.
- Dropshadows are a texture mapped onto a floor or wallshadow mesh and mapped to a shadow file.
- Dynamic shadows are the big shadows that move relative to light sources such as lamps, windows etc.
Wall objects
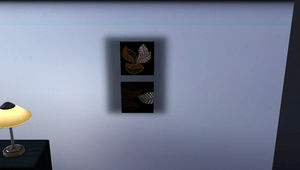
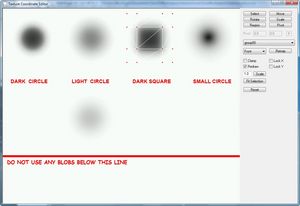
If the shadow on your new object doesn't quite match with your mesh, you will need to remap the shadow mesh. All meshes are mapped to a standard image blob. This is one texture with multiple shapes and variances of shading to give a darker or lighter ground shadow or wall shadow.
- NOTE: This is no longer a default texture pulled in the cloner, so if you need it you will need to untick the defaults only box when cloning. You can also save this image to reuse later, since it doesn't need to be included in your package you just need it to remap your shadow mesh to.
Floor Objects
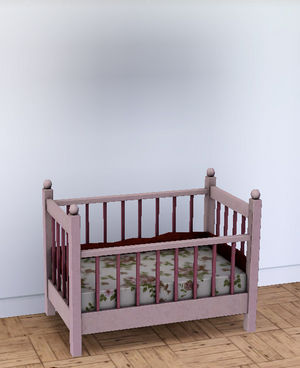
Objects also have a LITE resource that cast indoor shadows. They are sized based on values in the LITE resource. The current version of s3pe does allow editing of these values but no specific tutorials exist as of yet to adjust this.This particular issue was fixed by replacing the LITE resource in this package with the LITE resource from the Cheap Crib.
- NOTE: As values in the LITE resource are defined the 0x03B4C61D - LITE resource packed file type is updated.
Outdoor shadow is from another object
You didn't change the sunshadow mesh! An object has four meshes, one for high detail and one for low detail plus a sunshadow to match each respectively. When you edit the mesh you need to create a new low poly version to use as your sunshadow so that if used outdoors it will cast the proper shadow.
- MLOD 00000000 High detail mesh
- MLOD 10000000 High detail sunshadow
- MODL 00000001 Low detail mesh
- MLOD 10000001 Low detail sunshadow
If all else fails
But I know I did all of the above right!? If you really did fix any issues you may have had above and the same problem persists, did you remember to empty your caches?
If that still doesn't fix then you can post a help question in Object Creation
| Tutorials by Category | |
|---|---|
|
CAS | Patterns | Objects | Building | Worlds | Modding | Modding Reference |
