Tutorials:STF Conversion Tute Step 13
From SimsWiki
Configuring the package to recognize your the correct number of recolors.
Even though you've pulled the extra texture into your package, you still have to associate the extra textures as recolors of the primary texture. There are several windows for this next process. I suggest you arrange your windows so you can view all the necessary pieces. You will remove unused recolor options and configure your package to recognize your extra texture.
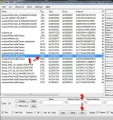
- Click on the default main texture. Note the primary texture's instance number - 0x80C38CF8AC3ACA70
- Now find and note the second texture's instance - 0xE2DA8A46089A4CC8
- Click on the OBJD tag and then click the GRID button
- On the Data Grid window, click the small box with the 3 dots on the far right.
- The next Data Grid window shows 3 material options. Since this image only has 2 colors, select the 3rd one [2]material and delete it. If you leave it in, your mesh will have extra recolors of the same thing.
- Select the 2nd color options - Click [1]Material and then click the TGIBlock and then the 3 dot button.
- Telling the package how to associate the second texture and hook it to the primary texture can be a bit confusing until you get the hang of it. What you are doing is picking the 2nd material TGI Block and telling it what the second color option is using it's instance number.
- Find the instance of your original texture (80C38CF8AC3ACA70 ) and click on it. In the Instance text box, replace the existing value with the instance value from hour second texture. Click Save. and ok to close the Material Data grid box and then Commit.
- Save your package - File Save.


