Sims 3:Creating a game compatible Visual Studio project
From SimsWiki
Contents |
Step 1: Create a New Project
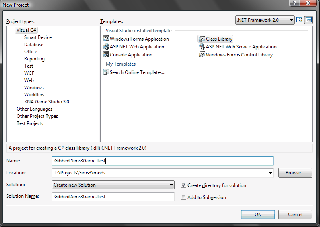
- Set the framework version to .NET Framework 2.0.
- Use the Visual C# Class Library template.
- Preferably prefix the name of the library with your name / handle. Eg, Gibbed.Sims3Game.Test is what I would use. —Rick
Step 2: Remove all existing references
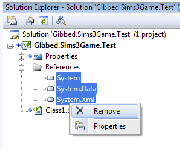
- Select all references, this is usually System, System.Data, and System.Xml..
- Right-click the selected references, and select Remove.
Step 3: Set the project to not reference mscorlib.dll
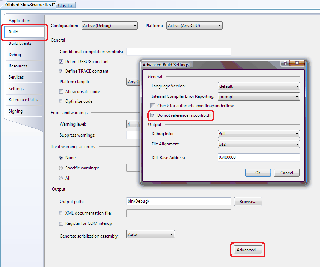
- Open the project properties.
- Set the active configuraiton to All Configurations.
- Change to the Build tab.
- Click Advanced to open the Advanced Build Settings window.
- Check Do not reference mscorlib.dll and click OK.
Step 4: Add references to the Sims 3 assemblies
You will need to have already extracted and decrypted the Sims 3 assemblies to do this step. See Getting Started with Scripting Modding if you haven't done this already.
- Right-click the References item in the Solution Explorer.
- Select Add Reference....
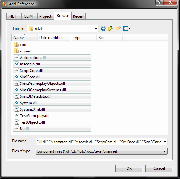
- Select the Browse tab.
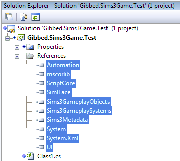
- Select all of the Sims 3 assemblies. The assemblies you want to add are mscorlib, ScriptCore, SimIFace, Sims3GameplayObjects, Sims3GameplaySystems, Sims3StoreObjects, Sims3Metadata, System, System.Xml, and UI.
- Click OK.
VS 2012 Users: You will see the following warning when you compile:
1>C:\Windows\Microsoft.NET\Framework\v4.0.30319\Microsoft.Common.targets(1578,5): warning MSB3270: There was a mismatch between the processor architecture of the project being built "MSIL" and the processor architecture of the reference "Sims3Metadata", "x86". This mismatch may cause runtime failures. Please consider changing the targeted processor architecture of your project through the Configuration Manager so as to align the processor architectures between your project and references, or take a dependency on references with a processor architecture that matches the targeted processor architecture of your project.
To prevent this warning, you must change your project from Any CPU to x86. Use the drop down menu in the second tool bar to do this. You may need to use the Configuration Manager to add x86 to the drop down menu.
Step 5: Set the references to not Copy Local
- Select all references.
- Set the Copy Local property to False.
Step 6: Fin
You're now ready for coding. :)
