Tutorials:CAS Creation From Start-To-Finish - Texturing
| CAS Creation With Daluved1: From Start-To-Finish | |
|---|---|
|
Planning | Meshing | Creating A New Package | Texturing | Finishing Up | Glossary | |
Contents |
Texturing
Now here comes the part that separates the mice from the men, and the okay creators from the awesome ones! No matter how detailed and intricate your mesh is, if your texture is lackluster, then your whole project is a bust.
Throughout this part of the guide, you will encounter various textures that need to be edited. I suggest you read through this List of Texture Types to get a feel for what each of them do.
At this time, open up CTU again. Go to File -> Open and navigate to the package you just created. If you had saved it right, when your package loads you should see *Custom next to the mesh field, and the Mesh Name as whatever you named your mesh.
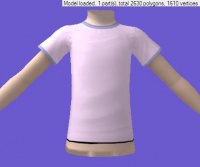
To get the 3D preview of your mesh to load, simply click on the Designs tab. You'll most likely be greeted with something like this when it first loads. Because of the adjustments we made to the mesh and UV map, part of our mesh will be missing textures. But this is easily fixed with the alpha channel of our base texture. Which is why that is naturally our next step in the creation process.
Setting the Alpha
Under the texture tab, we want to double click on the Base Texture key value. When the preview window pops up, click export on the bottom right. Give this texture a good name, and save it with your working files. This is the texture for your entire project.
Open up the file in your paint program. I'm using Photoshop's nVidia plugin, so it's just as simple as going to File -> Open to get the image into Photoshop. If you are using a different program, the import process might be slightly different.
|
If prompted, click load default sizes and do not generate MIPmaps. MIPmaps are essentially increasingly smaller versions of your texture that the game caches in order to more quickly render your object at different distances. When we get ready to save our final texture, our paint program will automatically generate these for us. |
Cover Me Up!
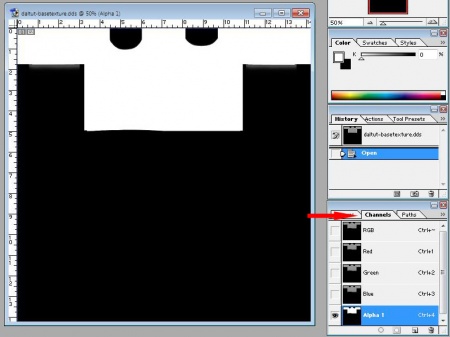
In your paint program, make the channels visible for editing. In Photoshop, you simply click on the channels tab and select the alpha channel at the bottom.The alpha channel of our DDS texture controls the visibility of the texture on our mesh. The parts that are black denote areas that are without texture. Generally, these areas are where skin is supposed to show.
It is vice versa for white areas; they block out the areas where our texture will show up. Since the bottom of our shirt mesh is lacking texture, we will have to pull down the bottom of our alpha channel a bit.
It's really as easy as it sounds, simply fuzzy select (with the marquee tool) the bottom of the alpha channel and move it down a few notches with the arrow key. Be sure to go back and fill in any gaps created by moving the bottom down.
To test and see if we pulled our alpha down enough, we can save our changes and preview them in CTU.
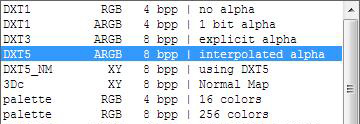
Go to File -> Save and select DDS from the file types list. You may be presented with a long list of compression types. With base textures, we want to save them as DXT5 (interpolated alpha). Once you select this compression, hit okay.
In CTU, right click on the Base Texture key and replace the image it with you new texture. Press commit at the bottom of the window, and you should see your textures reload on the 3D model.
If you nailed it the first time, the stomach of the mesh should be covered. If not, play around with this step until it is. However, be careful not to but the bottom of the alpha down too far because you might have issues with overlapping textures later.
I also want to change up the collar of the shirt to something a little more girly. So, I'm going to alter that part of the alpha a bit.
Setting Transparency
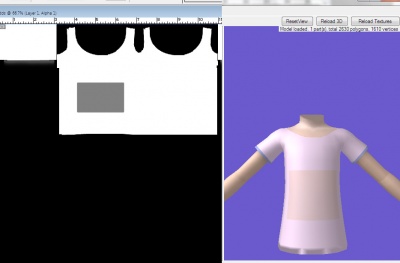
You are not limited to just solid chunks of black and white on your alpha, you can also add transparency to your clothing. I'm not going to incorporate this element into the design of my shirt, but I can show you how it is done.If you use shades of grey between RGB values 151/151/151 - 149/149/149, you will get a translucent affect to the texture. 151/151/151 is the lightest (think highlights) whereas 149/149/149 is the darkest.
That is, the darker the grey the more transparent, and vice versa.
Base Texturing
This step is really up to you and how you wish to texture your mesh. To add details to your texture, you simply hide your alpha channel and work on the combined RGB channel. For a more in depth look at base texturing, read Creating A New Base Texture. Unfortunately, there is no one guide to truly tell you how to texture, you just have to sort of learn on your own.Never fear, here is a list of some "toolobox tutorials" that can be used to guide you. These tutorial relate to clothing, but are specific techniques, tools, and tips helpful to beginners and more experienced skinners alike, for trying something specific. Some of these tutorials may be written for Sims 2; however the same techniques can be used in Sims 3.
- Creating fabric folds in Photoshop
- Texture Glossary and Proper DXT Compression Types
- How to add shadows and highlights
- Texturing With the Smudge Tool
- Using Milkshape to Preview Body Shop Textures - this tutorial is written for Sims 2. You can find Sims 3 example bodies (required for previewing skintones) here.
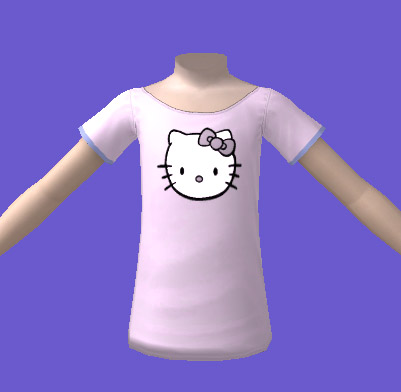
After a little fiddling in Photoshop, this is what I've come up with so far. Notice I have my cleaned Hello Kitty image on the shirt, and that it has been desaturated of color.
Overlays
The next step is to set up my overlay. But, wait! What's the difference between these and stencils?
Stencils vs. Overlays
The CTU has the capacity to use both stencils and overlays. Both of these CAS files create a non-recolorable design on your clothing. Stencils conform to the alpha of the base texture, whereas overlays don't. This means, that you can add a necklace over a shirt with an overlay, but not with a stencil.
Because it's so limited, stencils are hardly ever used; overlays are really the way to go. I'm going to make some of the elements of Hello Kitty into an overlay, but if you are interested in how to make stencils, read this tutorial.
Mask
Proper Specular
Part Mask=
Linking Textures
Separate tutorial!!
