Tutorials:TS3 HTMG ChapH MeshingMilkshape
From SimsWiki
| Meshing in Milkshape | |
|---|---|
Contents |
H. Meshing in Milkshape
Import into Milkshape
H1. Open Milkshape.H2. Import into Milkshape.
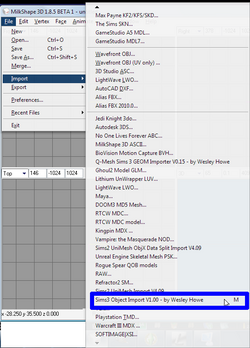
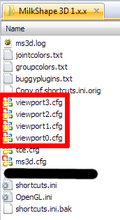
- If you had created the shortcuts, you could just press the key combination (mine is setup as "M"), but if not, the Import plug-in is located in File menu → Import. See picture on the right.
 Tip:
Tip:
If you don’t see it,
- have you downloaded it?
- is it in the Milkshape installation path? It must be in this program’s root folder. It will not work if you put it in a subfolder.
- have you downloaded it?
Collecting Statistics
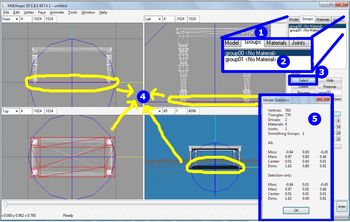
H3. Before we begin making changes to our mesh, let’s retain some information we would need later on to make sure our cloned object works as intended.- Click on the Groups tab, select the first group –
group00
- Click on the Select button, and you get the following selected, which is the ground shadow of this table (it uses the dropshadow texture). Different objects will have different groupings & arrangements, so do a thorough analysis before you proceed.
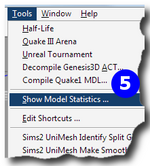
- We are going to capture the statistics as well, this can be found in the Tools menu → Show Model Statistics
- Click on the Groups tab, select the first group –
- Do these for all the MLOD/MODL files you export and would modify. For analysis, I found it easier to digest when I have all the information in a table form.
- Do these for all the MLOD/MODL files you export and would modify. For analysis, I found it easier to digest when I have all the information in a table form.
| dimensions, x y z | center, x y z | vertices | polygon | groups | materials | joints | |
| MLOD 00000 |
1.82 0.80 0.82 - 1.92 0.00 0.91 - 1.82 0.80 0.82 |
0.00 0.40 -0.00 - 0.01 0.01 0.01 - 0.00 0.40 -0.00 |
783 26 601 |
770 32 744 |
2 - group00 - group01 |
0 | 1 |
| MLOD 10000 | 2.00 1.59 1.65 | 0.00 -0.20 -0.28 | 404 | 744 | 1 | 0 | 1 |
| MODL 00001 | 1.81 0.79 0.81 | 0.00 0.39 -0.00 | 306 | 196 | 1 | 0 | 1 |
| MLOD 10001 | 2.00 1.58 1.63 | 0.00 -0.21 -0.19 | 128 | 196 | 1 | 0 | 1 |
- The 1000x versions make-up the sunshadows of the 0000x versions, and they look to be lower-poly than the 0000x versions. They are also placed off-center relative to their 0000x counterpart. For this dining table, at least, they appear to be a smidgen longer(x-axis) and double in height(y-axis) and depth(z-axis).
Analyzing existing UV map
H4. Analyzing the mesh and its UV-map.
- Ok, now we have imported our MLOD 00000 mesh. In order to make changes and decide what can be removed or retained, depending on how much you want your new table to differ from the original; we need to ungroup the main mesh’s groups (if the object has more than one). In the case of this table, it has 2 groups:
group00is the ground-shadow that uses the dropshadow texture andgroup01that uses the main texture, its matching specular and the part-mask images
- ms3d do not have an ungroup feature – we need to separate out the existing group by "regrouping".
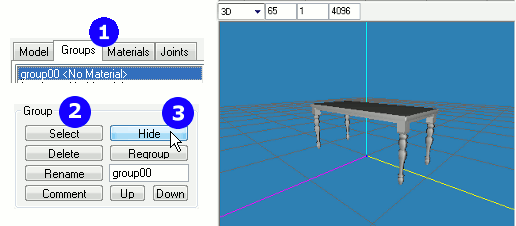
- Let’s hide the shadow first. From the Group tab, click on
group00, then Select button and then Hide. 3D view in ms3d shows group00 hidden away.
- Ok, now we have imported our MLOD 00000 mesh. In order to make changes and decide what can be removed or retained, depending on how much you want your new table to differ from the original; we need to ungroup the main mesh’s groups (if the object has more than one). In the case of this table, it has 2 groups:
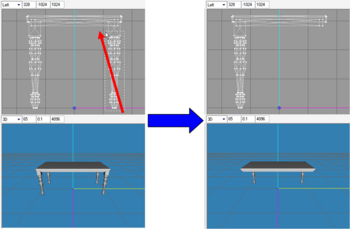
- Go to Select tab, ensure the Select Options are set as shown. We want to have the faces of what we enclose and have both right table legs selected. If the Ignore Backfaces option is checked, we would only get one leg selected. If you selected the wrong vertices or faces, clicking anywhere in the gray area will deselect everything.
- In the Left viewport, select the right leg from the bottom corner to the point indicated by the red arrow. We should get the legs selected, but not the table top or the table base. Then tab back to Group, click Regroup. We should get a new Regroup00 in the Group list. Click on this new group, click Select and then click Hide button. Ta-da! Bye-bye Legs!
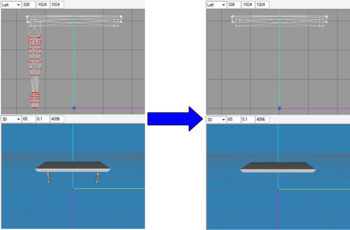
- Repeat the steps for the other pair. So, now we have a floating table! You can rename the groups as you like.
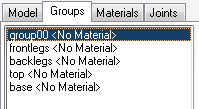
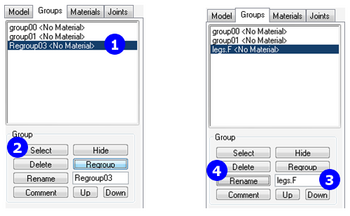
- These are my new group names (right pic – example shown is for another model, so the names I used are different).
- To rename:
- Click group name in the list –
Regroup03
- Click Select button.
- Enter a new name beside the Rename button – "
legs.F"
- Then click Rename.
- Click group name in the list –
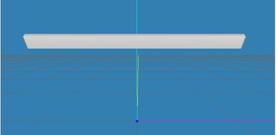
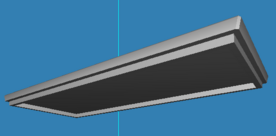
- Let’s match this to the UV map. Note the shapes of the table edges – they are beveled (left pic) and there is a base (right pic).
- Go to Select tab, ensure the Select Options are set as shown. We want to have the faces of what we enclose and have both right table legs selected. If the Ignore Backfaces option is checked, we would only get one leg selected. If you selected the wrong vertices or faces, clicking anywhere in the gray area will deselect everything.
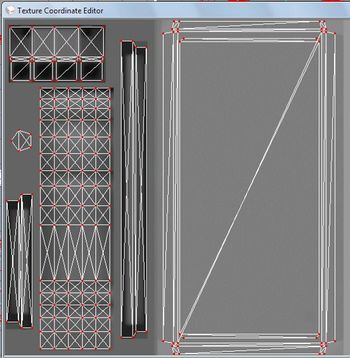
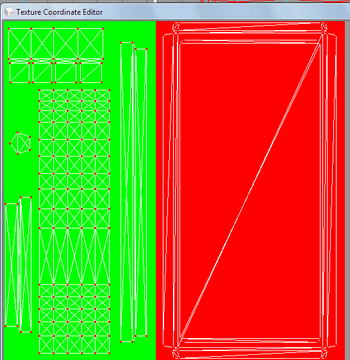
- So here are the set of UV maps for this table. The way I got these is:
- Select the groups, except for
group00.
- Tab to Materials, click New (1). You’ll get a new Material in the list with some number.
- See pic on right. Click the top <none> button (2) and navigate to the dds/jpg images that you exported from s3pe /altered earlier, select the image you want to map to and click
 (3 – no pic).
- Click Assign (4) and your Group tab would now list the groups with <Mat: materialnn>, instead of <No material>.
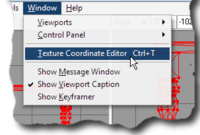
- With the groups still selected, go to Window menu → Texture Coordinate Editor.
- Select the groups, except for
- So, what do these pictures tell us? (BTW, these picture are the original grouped version because I wanted to explain while I have all the items UV-mapped in one screen per material).
- If you had regrouped correctly, you can click each group in turn from the dropdown list. The top of the table (without base) is the 1st CaST pattern in Create-A-Style (the red section) and all the rest will take the 2nd pattern. Notice how the beveled strips of the table’s edges are all laid out? The whole concept of UV mapping will be tackled in a later section.
- The base and legs are on the left side.
- The leg parts are all those diamond-looking maps and the legs’ tops and base are the ones at the top left corner.
- The table’s base is the long double strips – one for the length and the shorter one for the width. I haven’t figured out what the pentagon shape is for, though.
- So here are the set of UV maps for this table. The way I got these is:
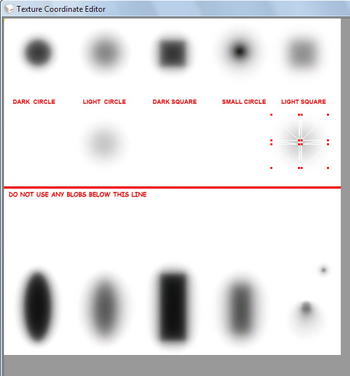
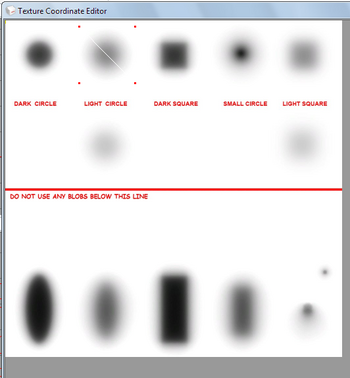
- These are the shadows.
- I have ungrouped the legs’ shadows from the main shadow.
- The left pic is for the ground shadow and on the right for the base of the legs (no idea why they are set to have separate intensity).
- These are the shadows.
H5. Let’s get the PARTY started!!…uh…uummm, I meant let’s start meshing…already!
- Throughout the writing of this document, I have done numerous versions and abandoned and change the table’s design and texture map so I’ll be showing 2 cycles of my attempts.
- Cycle 1 is where it didn’t get past meshing, because the UV mapping stage was too complicated for my beginner capabilities and it was hard to document. But, I’ll still show the steps as this is where I learnt how to apply meshing terms to actually doing the mesh and seeing it come to a 3D version from a picture. If you want to create something, just read through this part, and take note of the steps, but start creating along at Cycle 2 (sorry!).
- Cycle 2 made it all the way to testing in-game, there are flaws to fix. Hopefully, when we do, this is the one which will become the end product of this whole exercise!
- PS: Whenever I run through steps that have been illustrated before, I’ll just ask you to do them without giving the step-by-step. New Instructions will still be illustrated. Don’t worry, you’ll be able to follow along just fine! And remember to save periodically….
Questions? Problems?
- If you encounter any problems with the steps outlined in this tutorial and need help, head on over to the Step-by-step Start-to-Finish HowTo mesh guide for TS3 thread to post your questions or
- If you need help in fixing your mesh, you may want to browse through our TS3 Meshing FAQs for some of the more common Meshing issues and their fixes or
- If none of the above links provided any help, you may want to browse through the threads in MTS' Meshing Forum or even start your own thread.
| |
|
TS3 HTMG ChapH MeshingMilkshape | |
|
