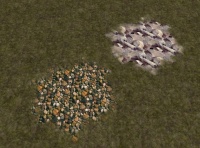
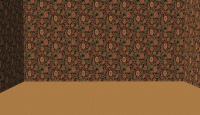
- In Game Usability: Walls, floors and terrains have to be usable in the game. Try to make something that your sims will want to decorate their house with and that you would see in a real life house.
- Colors: Calling it sci-fi or psychedelic won't fly. If you insist on neon wall paper then decorate an entire house with it and play the house for two whole days. Then come back to us.
- Scaling: Terrain paint with a beautiful leaf texture is unusable if the leaves are the size of a pool table. Same goes for flowers on the wall that are bigger than a sims head. Go for scales that could realistically belong in a sim's house. Compare your texture to a sims hand or head. They should almost never be larger than a sim head.
- Remember that if you're using a photo for your texture, you need to think about how zoomed-in the original photo is. If you take a photo of one square inch of a surface, and use it as a whole floor tile, it's going to look wrong, even if the photo is of a high enough resolution that the texture doesn't end up being blurry. This is particularly important for textures such as stone and concrete, where it's not always obvious by looking how big the area shown in a photo is.
|
- Paintings and Logos: Don't take a pretty picture or a photo of yourself and turn it into a wallpaper. The same goes for anime, comic book pics, random posters of celebrities, etc. Try to make something creative that could realistically go on a wall or floor. Look at home decorating sites for inspiration.
- Murals: If you want to upload a mural, it's usually better to do so as an object - a large, flat painting which can therefore match multiple wall styles.
- Seamless: Make your textures seamless. Do not make a pattern that abruptly cuts off on every tile; make sure that the colours match on the edges. If you are making tiles, use grout so that they look like tiles when laid on a floor.
| Wall/Floor Texture (*)
|
| Although the main focus of a wallpaper or a floor is the pattern, they do need shading and texture details as well as just a flat pattern. Wallpaper often has raised/embossed details, and the texture of the paper should be visible - whether that's a rough, grainy texture, or a subtle weave, or anything else. When making floors, think about what type of floor you want to create - is it carpet, lino, tiles, stone etc? - and work on the texture to make it look like real 3D flooring, not just a pattern or colour pasted onto the floor.
|
| Double-check for Distortion (*)
|
| Unfortunately, walls are very prone to distortion. This is because the game squishes wall textures horizontally. You will need to look carefully at your wall texture, and may need to stretch it in your graphics editor, to get it looking right in-game.
|
Screenshots
| Required Screenshots (*)
|
|
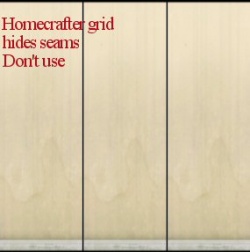
Your screenshots are the basis on which people download your work. After working for hours on a wall set, take care to present it in a nice way, as well. Do not take screen shots from HomeCrafter. These give very little information to your downloaders and if the grid's still in place, it hides seams.
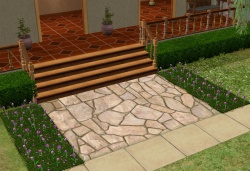
Make sure you take some good in game shots of your downloads spread across several tiles. People will want to see what the download looks like if they decorate a room with it and so that users can see how it looks when it's tiled. Terrain paint should be applied to several tiles as well. Add some plants or furniture as well, so downloaders can see the scale.
It's a good idea to include pictures of your content in a room or on a house/in a garden, since this helps sell your work to downloaders. However, make sure that you don't use so much furniture/windows/shrubbery that your content is obscured.
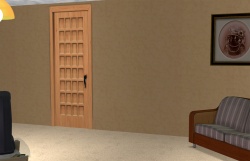
- As a rule of thumb, your screenshots should include every wall spread over at least three continuous tiles, or 2x2 for floors, without any furniture obstructing that section of wall/floor. For terrain paints, the appropriate size of uninterrupted paint depends on the scale of your terrain paint.
|
Keep the following in mind for your screenshots, especially the required ones:
- Size: 800 pixels wide by 600 pixels tall is a good size for the smallest pic you would want to upload. Your images can be up to 2560x1440 pixels, and 800 kb, so you have lots of space to work with!
- Lighting: For most things, it's best to take pictures in an interior room with good lighting. For lots, pictures should be taken during a nice sunny day, for floorplans, take the pictures with the lights ON.
- Clarity: Neither blurry, nor pixellated/crunchy. Do not size up small pictures to make a large one as this will blur them, and make sure not to use too much compression/too low quality when saving your images.
- Distance: Take your pictures so that your creation fills the screen without anything cut off at top or bottom - neither zoomed in too close, nor zoomed out too far.
- Distortion: If you resize your images, retain the aspect ratio so they don't get stretched or squashed. Take care when zooming in and out with the camera that you do not create a fisheye effect on your pictures.
- Photoshopping: Do not apply filters like sharpen, contrast, etc. to the required pictures, as downloaders want to see what your creation will look like in their game, not your skills at using Photoshop.
- Attached: All required images must be attached directly to the MTS upload, not just inserted using the img tag, so that even if the pics get deleted from your Photobucket (or other host), the upload on MTS is still complete.
- Show all items: For most areas, if you are uploading a set, you must take all the required pics for each item in the set. If there is an exception, it will be noted.
- Picture limit: You may upload up to 100 pictures for a single upload thread, so feel free to add some additional pictures just to show off your work to its best. Of course, keep it reasonable - nobody needs 50 pics to show off one sim or hair.
- Inline pictures: Inline pictures are those that use the [img] tag to show up in with the description text. So that it doesn't take too long to load, please keep this to no more than 4 pictures done inline, unless you put them inside an [infobutton] tag. To do this, see our guide on post formatting.
| Screenshot tips
|
| Camera Controls:
Take some time to just play around with the camera. It can take a while to get used to the camera controls, and even once you are experienced in their use, it may be challenging to get the shot you want with the constraints on the controls.
If you haven't taken many sim pictures before, here is a list of camera controls:
- TAB : Puts the game into Cameraman mode, allowing better and more control of the camera, and removing the blue user interface. Make sure you are in live mode before going into Cameraman mode or you will see grid lines on the ground and floating where floor tiles may be placed. TS3 Note: You will only be able to go into cameraman mode once per load if you are in buy/build mode (without a family moved in). You can either exit to the neighborhood and return to take more pictures, or instead just move a family in for taking your pics.
- W and S : W moves the camera forward. S moves it backward.
- A and D : A moves the camera left. D moves it right.
- Q and E : Q lowers the camera. E raises it.
- + and - : Zooms in and out.
Windowed Mode:
- TS2: In order to take your pictures using the methods described here, you will need your game running in a window, so you can easily switch to other applications without causing major instability and lag. Instructions on setting up Windowed Mode for Sims 2 may be found here: Game Help:Windowed Mode. Windowed mode should be perfectly safe - in fact, some users actually report better game performance when running in a window. Your mileage may vary.
- TS3: In Sims 3, you can use windowed mode by simply choosing it in your game's options. Full instructions can be found in Game Help:TS3 Windowed Mode. Windowed mode will allow you to use Print Screen or FRAPS or whatever screenshotting program you desire, without getting dark pictures. If you choose to NOT use windowed mode for TS3, you must use the C key to take pictures using the in-game camera - taking pictures fullscreened in TS3 without using the C key will result in icky dark screenshots.
C Key vs. Print Screen:
- TS2: In order to take nice big pics, you should not use the game's screenshot system, using the C key or the camera button on the game's controls to take your pictures. Even on the highest picture settings, pictures will still be small, with a very high level of JPEG compression, making them blurry and crunchy. Instead, use Print Screen or a screenshot program.
- TS3: The C key camera is much improved in TS3, making it possible to use to take pictures for upload and still have nice big, pretty pictures. You can still use a screenshot program or print screen if you desire, but you will need to run your game in Windowed Mode (see above) to keep your pictures from getting dark.
Using Print Screen: If you have enough RAM to run Photoshop or another graphics editing program at the same time as TS2/TS3, you may want to take screenshots yourself, without the use of a program to store them for you.
To do that, simply press the Print Screen or PrntScn key on your keyboard - it's usually off toward the right, over the arrow keys, above Insert and Delete. This will copy your current screen to your Windows clipboard, as if you had selected and copied it as an image.
Then open any graphics editing program, create a new document the size of your monitor's resolution, and paste into that document. Your screenshot should appear in the document.
Screenshot Programs:
There are many programs available, free and pay, that will take screenshots for you by using a hotkey, and save them to a folder - just like The Sims 2 with the C key, but with options for much better quality settings.
A quick Google search for 'free screenshot program' will also bring up many other options, which may have other features that are of interest to you.
Optimizing, Editing, and Compressing Images:
Many simmers struggle with getting their images to be clear, crisp and under the maximum file size while keeping the image size larger than 800px by 600px. After getting your images from the in game camera or using a print screen program you will need to resize them and compress them into a jpeg image. Many graphics programs have a built in optimizing feature. Here are a few common ones:
|
Uploading
| Upload in sets
|
| If you have created several items in a set, or similar items in the same sort of theme at the same time, please upload these together in a single set, all on one thread (instead of all separately, one by one, on different threads). This is easier for everyone: on our upload moderators, as they only have one thread to review rather than several... on you, as submitting a single thread is much quicker and easier than several... and on downloaders, as they can get everything they want all in one place rather than having to hunt around.
If you are doing a huge set, you can always break the set up into pieces, posting more screenshots along with the downloads as comments in the thread, as is done here and here. To do that, create a new thread in the Creator Issues Forum and arrange your thread there, using the first post as an introduction, and attach your uploads and images to subsequent posts in the thread. When you're done, PM a moderator to have it moved to the upload queue. For more information, read the message that displays when you go to post in Creator Issues.
|
| Label Pics/Files (*)
|
|
If you are uploading a set of different colours or designs, please name the files, and add labels to the screenshots, or otherwise make it clear which file is which. This is especially important if your set is big or contains different designs, as downloaders may not want everything in the set.
|
| Upload Package Files (*)
|
|
Upload .package files - do not make sims2packs. It's not necessary, and creates extra steps for people to install them - it is very easy to go get the package files from your downloads folder. Also please give the filenames recognizable names. (See message #6 in this tutorial for exact instructions)
|
| Catalog Location (*)
|
|
Let your downloaders know where they can find your new walls and floors. Please give the location of your walls and floors, as well as the price.
|
| Zip, Rar, or 7z
|
| To upload your file(s) to MTS, you will need to compress them into an archive file, which makes them smaller and allows you to include many files in one download. The archive file formats we currently accept are .zip, .rar, and .7z.
For instructions on compressing your files into an archive, please see: Creator Guidelines: Creating Archive Files.
- Do not include multiple archives with the same contents - that is, please don't put your files in both a .zip as well as a .rar because some people only want .zip files. Choose one format.
- Do not double-compress your files... a .rar file inside another .rar file (or any other archive inside another) doesn't compress it anymore, and it makes it so we can't see the contents without downloading, and also just makes an extra step for the people downloading.
- The file size limit on MTS is 50 mb. If you exceed this limit you will need to split your archives. This should probably never come up except for large worlds for The Sims 3, or huge sets of smaller items.
|
Additional Stuff
- If your upload is rejected or marked as changes required and you're not sure why, ask in Creator Issues.
- If you're not sure whether your neighborhood is ready for uploading, use the Creator Feedback Forum to get feedback on it.
|
