Tutorials:Sims 3 Custom Patterns
Contents |
Creating Custom Patterns for The Sims 3
This tutorial explains how to make a custom pattern for The Sims 3 - both the editing of the image that you will need to do as well as how to get it to work in Delphy's Pattern Creator.
Instructions are provided on to set up and edit your image so that each colour you want to be changeable as one of the colour palette options is on a separate channel (Red, Green, Blue, and Alpha).
Please note, you cannot just import an image directly without major editing!!! You must have the colour-separated versions so that you can recolour each part of the image separately!There is no "easy import" option - it just doesn't work that way! Doing a custom pattern is a time-consuming process that requires care and thought, as well as quite a bit of effort. It is just NOT possible to just use any old pattern and just import it straight away (well, except maybe in the case of images that can be purely colour-slidered like wood grain where you don't want to choose more than one colour for the pattern). It looks crappy and doesn't work right. Having done several, I can see why they didn't just give us a tool to make our own, as it's not easy or quick.
So if you say "gosh that looks complicated, can't I just import my image?" I will come to your house and fill your computer with dirty socks.
Difficulty Level
You will need some pretty extensive knowledge on how to work a vector drawing program. I will explain how to setup your layers and channels and suchlike, but I will not be teaching you how to use your vector program. If you have no idea how to use Illustrator or Inkscape, google for basic tutorials.
You will need
- A vector drawing program such as Adobe Illustrator (pay) or Inkscape (free).
- A raster image program such as Adobe Photoshop (pay) or The Gimp (free).
- DDS Plugins for your raster image program. There's one for Photoshop as well as The Gimp. Both plugins are free.
- Delphy's Pattern Creator
- An existing image you would like to convert, or a good idea for a pattern you would like to create. Not all patterns will be easy or quick to convert!
The Tutorial
Vectorizing the Image
This is, by far, the most time consuming and complicated part of the process. For some images, there may be an easier way to do this, but for complex geometrics, this definitely seems like the best way to do it. You can only skip this part if your image is a single colour like a fabric texture or wood grain. If you want to be able to recolour different parts of the texture, you gotta do this in some way!
For the purposes of this tutorial, I will be demonstrating a 4-colour pattern using Illustrator. You can do your patterns in any number of colours from 1 to 4 - 4 is the most complicated.
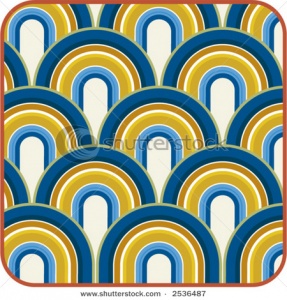
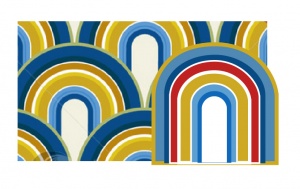
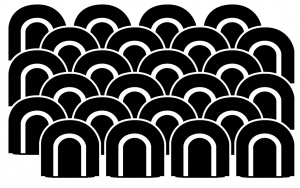
I'll be creating a pattern inspired by this retro arches pattern I found on Shutterstock. As you can see, it's a lot more complicated than just 4 basic colours, but I can simplify it as I work on it.
Step 1 - Import the Image
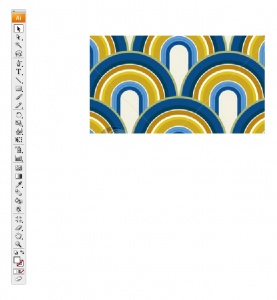
Start by importing the image into your vector program. I only need a small part of it for what I'm doing here, so I haven't bothered to import the whole thing, just enough that I can trace it.
Step 2 - Vectorize
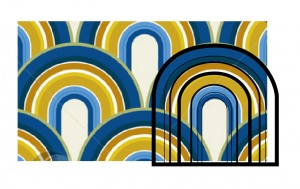
I'm skipping a lot of the fiddly work here, because every pattern is going to be different, and I'm not going to teach you how to do vector drawings all in one tutorial here. You want to basically trace over whatever lines you've got in the image, simplifying where you can (your final texture will only be 256x256 so don't go crazy with tons of detail), and remembering that you will have a max of 4 colour sliders to work with.When you're done, you should have all the basic elements of the pattern roughed out in vector shapes. Don't worry if they're not exact - nobody's going to see your original, only the result. Make sure to group important parts as you go along.
Step 3 - Define Colours
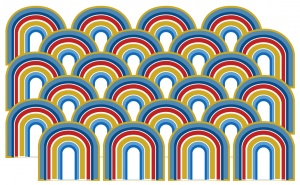
It's about at this point that you should define the colours on your parts. If you're doing a very simple design, you may not have to, but the more complex you get, the easier this will make things down the line.It doesn't matter what colours you use here, just that you use no more than 4 of them and that they're different enough from each other that you can tell at a glance what's what. You can define lighter and darker versions of the same colour, as you can see I've done - I'll explain further on how to handle those light/dark colours.
So for mine, I have white, mustard yellow, red, and blue, with the blue in lighter and darker versions.
Step 4 - Tile
Then set up your pattern for tiling. There are ways to do a tiling pattern directly in a vector program, but I find it easiest to just make a big swatch and crop later for most designs. If you're doing the tile-in-vector method, here's a good tutorial on doing the tiling.
Rasterizing the Image
After you've got it all done in vector, you need to get it into a raster format...
Step 5 - Colour Separate
Now comes the annoying and tedious part - separating each colour into black and white/greyscale images.
A note before we begin - there is a layering effect that happens with the separate colours, so arranging them in the proper order is important. Red is the bottom layer, green above that, blue above that, and alpha on the very top. You can overlap colours.
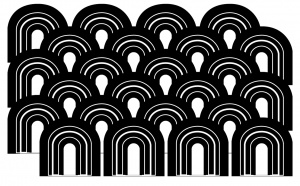
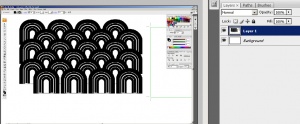
We'll start with the white colour for mine. I'm going to make the white colour, well, white, and all of the rest of my colours black.Then I need to save the result as a raster image. I find it easiest to just take a screenshot using Print Screen and paste each of the resulting images into a new Photoshop document on a new layer. If you do it that way, it's important not to move my zoom level or the scroll bars in Illustrator though, or they won't line up.
Undo so everything's coloured again, and now make the yellow parts white and everything else black, and again, screenshot and paste as new layer or save as raster.
Undo again to colour, and then repeat for red - red should be white, everything else black. Screenshot and paste as new layer or save as raster.
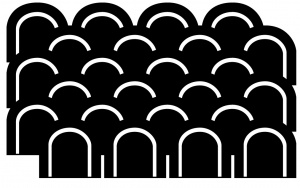
Finally, the blue layer. Now, you'll notice that for mine, I have -four- separate shades of blue - lightish, medium, darkish, and dark. So for that, I'm going to change everything that isn't blue at all to black... And then I'm going to make the blue parts greyscale - white for the lightest blue, and darker shades (20% black, 30% black, and 30% black) for each of the darker parts.
Screenshot and paste into your document as a new layer, so you should now have 4 layers above the background, each with a different set of colours as white/greyscale.
Step 6 - Finish Image
Take your raster drawing with the four layers, and make it seamless, cropping out edges or whatever you need to do. Make sure to make all your layers seamless in the same way! In Photoshop, Filter - Other - Offset is a great way to see that your image is seamless without having to tile it up yourself.Resize to 256x256. If you're using Photoshop, make sure to change the resize setting to Bilinear or you'll get seams around the edges, which will be visible in-game. It's usually okay if your image is a little bit distorted, if it wasn't perfectly square when tiling - again, nobody will be seeing your original image, just the result, so they wont' know it's distorted.
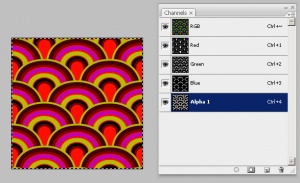
Time to assemble your four parts into channels. Make a new image the size that's 256x256, and bring up the Channels window. If you're doing a 4 colour pattern, add a new channel, alpha1. In Gimp, you'll have to do Colors - Components - Decompose to separate your image into channels.Next, take each layer from your 4-layer tiled document and copy it, and paste the contents into a different channel in the new document. Remember the layering if it's important to your pattern - red on bottom, alpha on top.
If you're using Gimp, it's a little silly - once you've Decomposed to split into channels, you can paste your different images as new layers and then rename them - red, green, blue, or alpha. You can't paste directly into the channels themselves.
When you get them all pasted and look at the RGB channel, it should look, well, pretty weird. You may not be able to see anything on the alpha channel very well. Flip through your channels to make sure you've got it all set up properly.
If you're in Gimp, you'll have to do Colors - Components - Compose to smush it all back together, and it won't look right at all after that - Gimp's a little weird like that.
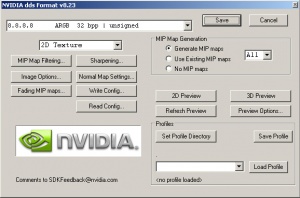
In Gimp, Compression should be set to None, Format set to Default, and tick Generate Mipmaps. If you get an error complaining about volume maps, just ignore it.
Make a Package
Now you're ready to get your texture working in-game.
Step 7 - Pattern Creator
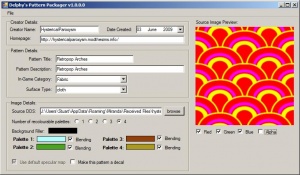
Load up Delphy's Pattern Creator. If it's the first time you've used it, read the license agreement, enter your creator name, and click I Agree.
Once you've got it open, File - New Pattern to, um, create a new pattern.Enter a pattern title and description, and decide on an in-game category and surface type. Surface type is thought to be used for the footstep sound when the texture is used for a floor. Choose something appropriate.
Click the Browse button and choose the DDS file you saved previously. Then choose the number of colours you want to be able to choose in-game under "number of recolourable palettes". I'm choosing 4 for mine. That will unlock the palette swatches below.
You can ignore the Background Filler swatch for most purposes - that's used for areas of the Red channel (background) where you have no background, but the Background Filler colour cannot be changed in-game using the colour palettes.
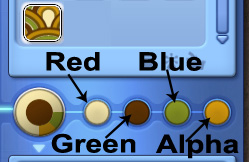
You can set your default colours for your pattern here on the Palette 1-4 options. 1 is Red, 2 is Green, 3 is Blue, and 4 is Alpha. Note that the image displaying your texture will not change accordingly - if you need to preview these colours, it's best to do in your vector document. You can always copy the RGB values into the blanks in the palette popup.
Leave the tickboxes for "use default specular map" and "make this pattern a decal" as default - specular ticked, decal unticked.
When you've got it all set up, File - Save As, and save your file with whatever name you want.
