MTS2:How to Package and Prepare you Lot
How to Package and Prepare Your Lot
Programs Required
- Sims2Pack File Utility
- Clean Installer
- A .rar or .zip Utility (just pick one and download it. They're all free and they all do the same thing):
Step 1: Read the Creator Guidelines
All lot uploads at Mod the Sims 2 are moderated for content. The Creator Guidelines detail the guidelines by which lots are moderated. If you would like to post your lot at MTS2, following the Creator Guidelines ensures the acceptance of your submission.
Step 2: Build your Lot
To learn new building techniques, check out our Build Mode Tutorials or our Community Tutorial Listing. To ask for help while building your lot, check out the [http://db.modthesims2.com/forumdisplay.php?f=21 Build Mode Discussion Forum.
Step 3: Save your Lot
Step 4: Take Screen shots
If you plan on uploading your lot to Mod the Sims 2, screen shots are required. There must be at least one screen shot that shows the entire exterior of the building, and at least one screen shot that details the interior layout/floor plan of each level in the home. See the Creator Guidelines for screen shot requirements. For screen shot ideas and tips, see also Screen shots 101 - Better Picture Taking.
Step 5: Exit to the Neighborhood
Step 6: Package the Lot
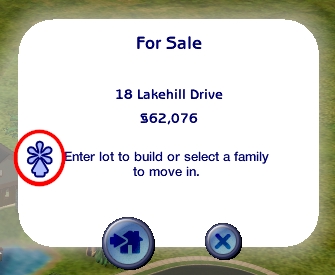
To package the lot, simply click on the lot from Neighborhood view, and click the * button as indicated in the screen shot below:
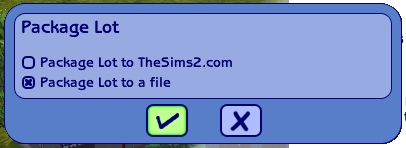
Then select "Package lot to a file" and click the check mark:
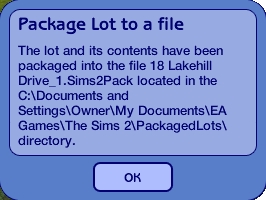
You'll get a confirmation screen telling you the name of the file, and that the file has been saved to your: C:\Documents and Settings\Owner\My Documents\EA Games\The Sims 2\PackagedLots directory.
Congratulations! You have packaged your lot into a Sims2Pack file.
Step 7: Clean the Lot with Clean Installer
Why do you need to complete this step? Because un-beknownst to you, when you saved your lot in your game, it saved more than just what you built. It also saved random items from your downloads folder (custom content). Some custom content can ruin other people's games. Other custom content is copyrighted by its creators, and you can get into trouble for sharing their work without authorization. For MTS2's policy regarding the sharing of custom content, refer to the Creator Guidelines. Keep in mind that if your lot contains content that someone else made, and that artist does not approve, your lot will be removed at their request. You would be allowed to upload a new version of the lot that does not contain their content.
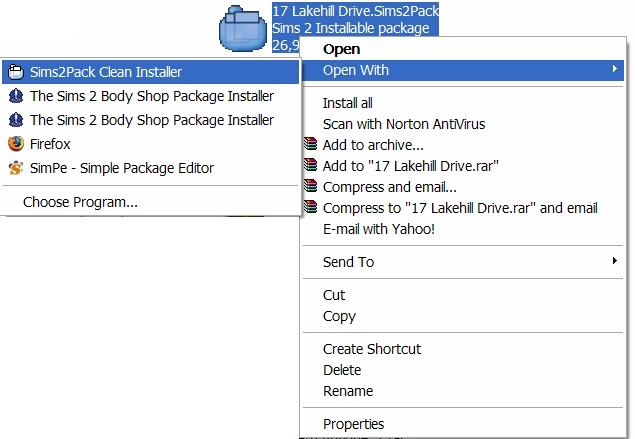
First, make sure you have downloaded and installed Clean Installer. Then locate your Sims2Pack file by navigating to your \My Documents\EA Games\The Sims 2\PackagedLots directory. Once you find the file:
- Right click on the file
- Select "Open With"
- Select "Sims2Pack Clean Installer"
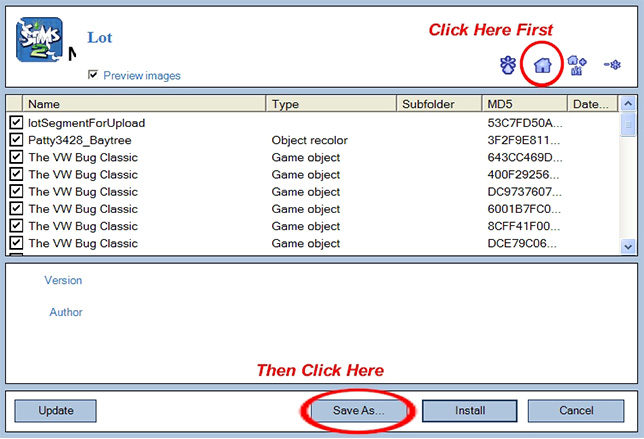
This will open your file in the Sims2Pack Clean Installer program. You will see a line that says "lotSegmentForUpload". That is the lot that you built. Everything else listed under that is custom content from your downloads folder.
To get rid of all of that content, simply click the blue house icon, then click "Save As":
At this point you must rename your file. If you try to keep the same name, the file will be corrupted and unusable. So give it a new name and hit save.
Step 8: Compress the New Sims2Pack File
In order to save bandwidth, users must compress their Sims2Pack files with zip or rar utilities. This makes the Sims2Pack much smaller, making it faster to upload and download. (Keep in mind there is a 10MB file size limit at MTS2.)
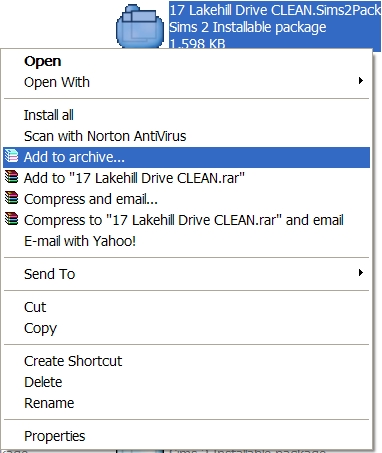
If you have Winrar, simply right click on your new Sims2Pack file, and select "Add to archive"
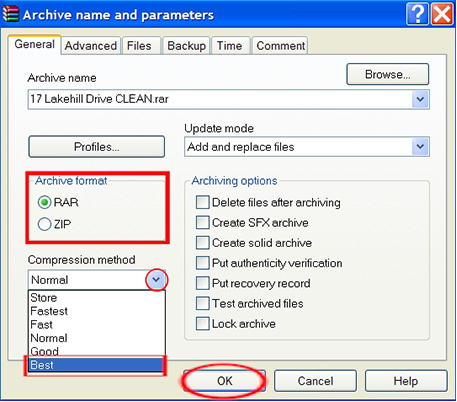
From there, select if you want to make it a .rar file or a .zip file.
Which should you choose? We prefer that you save the file as a .rar, because it will compress a Sims2Pack file to half the size of a .zip. Whatever you do, please do not upload both a .rar AND a .zip. Choose one or the other, do NOT upload both.
After you select the file type, select the "Best" compression method. This can make the file even smaller.
Then click OK:
You now have a compressed Sims2Pack file that is ready for upload
Step 9: Use the Upload Form to Submit Your Lot
After you've logged into your MTS2 account, click on User Tools in the top right corner of the screen, and select "Upload Items". From there follow the Upload Wizard FAQ for information on how to proceed.
Keep in mind that all submissions are moderated, so you will not see your thread in the downloads forum yet. You will receive a PM (Private Message) that your upload was received and then again once your submission has been reviewed. As long as you have followed the Creator Guidelines, there should be no complications in the approval of your lot. If there are you will receive a notice asking you to make the necessary changes or rejecting your lot if it doesn't meet the guideline criteria.
To report broken links in this post, or technical problems with the Upload Form, please post in the Site Issues Forum so that corrections can be made.
Credits
tdkjunkie for the original article
