Tutorial:Understanding CAS Modding/Part 1/Setting Up
Contents |
Part 1: Texture Editing
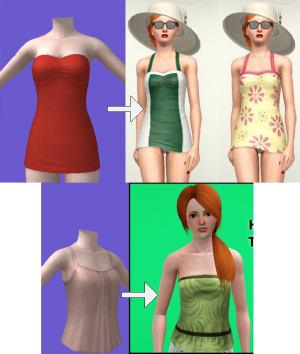
The simplest type of CAS mod is a texture edit - taking an EA mesh and changing the texture. Although texture edits are simple in technical terms, that doesn't mean that they have to be simplistic in terms of how they come out: texture edits can be used to add logos to shirt and suchlike, but they can also be used to make small tweaks which make a big difference to the overall look of an outfit, or to change it so much that it's not even recognisable compared to the original - see the images to the left for the examples of how.
You're going to learn all of the techniques used to do that, if you follow this tutorial through - it'll take time and practise to get right, but it's well within your capabilities. First, though, there are some things to set up.
Setting Up
CTU
This is the most important program you'll need! CTU is the program that we'll use to actually make a .package file which works in TS3. You can download it here:
Don't forget to read the instructions - in particular, make sure you download the CasParts.rar and unzip it in the right place, and make sure you get the DirectX Runtime, and .NET Framework (for XP or Vista and 7).
DDS Plugins
Sims 3 textures are all in the DDS format, which is fairly uncommon, so most graphics editors don't have support for it by default. You can install plugins, however, which will allow your graphics program to use DDS files:
- For Photoshop download the nVidia DDS plugins. Run the EXE, and they will install automatically.
- For GIMP download the GIMP DDS plugins (get the files labelled as binaries - you'll need to have 32-bit GIMP for these to work).
- For any other graphics editor, it is recommended that you download GIMP. You can then convert the DDS files to a format your normal graphics editor understands (make sure it supports transparency/alpha channels), and back again, with GIMP.
DDS thumbnail utility
Install this plugin to allow you to see thumbnails of DDS images in Windows Explorer - that is, when you open a folder with DDS files in it. Otherwise, they'll just have a normal icon but no thumbnail, and you'll have to open them to find out what they are.
Download here; scroll down to "DDS Thumbnail Viewer".
Extracting Textures
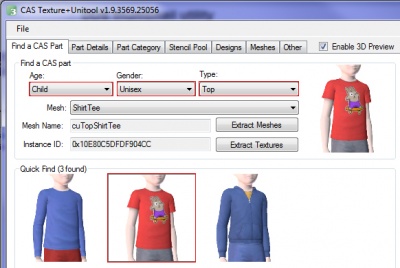
Okay! We're all set up, so let's get down to actually looking at the textures and figuring out how they work. Before you can do that, though, you'll need some textures to work with. So, first up, open CTU. You should see that the "Find a CAS Part" tab is selected, and that this tab has various filters to help you find the CAS item you want to work with. Use the filters to find the child teeshirt with a stupid skateboarding squirrel on it - it's as good as any.
"But the CAS part I want to use isn't there!"
Ah! If you've been poking around and thought this, then you've discovered that CTU only displays basegame stuff for automatic cloning. Usually, this isn't a problem: if you're making a new mesh, you should always clone a basegame item to make sure that your creation is basegame compatible (unless there's a good reason to do otherwise), and when retexturing it's better to choose a basegame item if you can, so that more downloaders can enjoy your work. If you do still want to clone EP content, or custom content, you can do so by follwing these instructions: Tutorial:Cloning EP content with CTU.
Okay, once we've picked out the shirt, it has to be cloned. Cloning is the process which changes all of the ID numbers of your CAS item, so that it doesn't conflict with the original item. Luckily, CTU clones automatically, so we don't have to do anything special in order to clone the item.
Go to the Designs tab in CTU, and then the smaller Textures tab. You'll now see a list of all the textures, labelled with their Resource Keys.

